Currently, a voter has to separately purchase votes for each contestant they want to vote for. This means that you cannot purchase 10 votes and split the 10 votes between different contestants. If you buy 10 votes, all 10 votes will be applied to the contestant in which they purchased the votes for.
There are a few methods you can choose for the quantity of votes the voter can purchase.
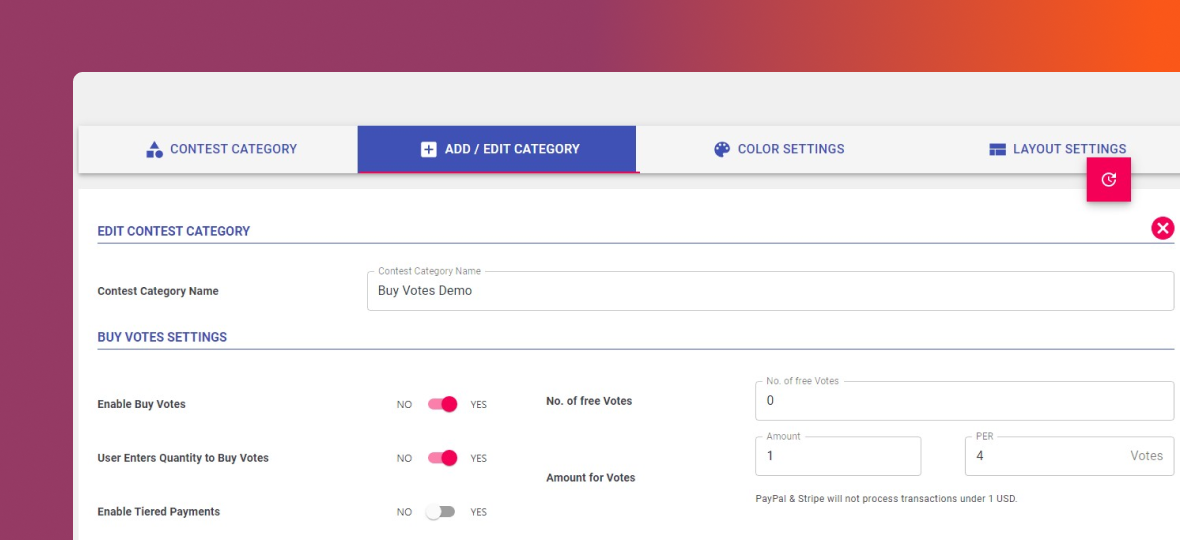
Here are the settings for the standard method:
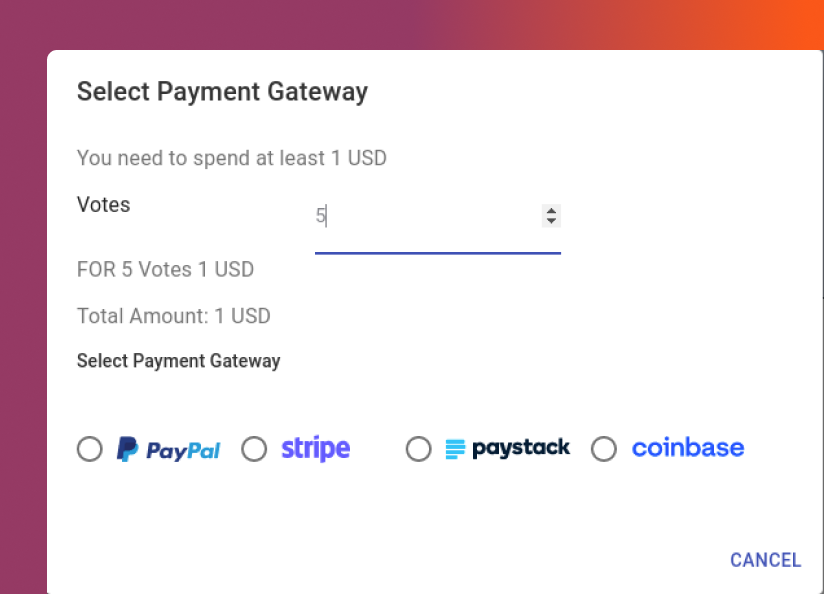
Here is the popup voters will see using the standard method when choosing both PayPal & Stripe:
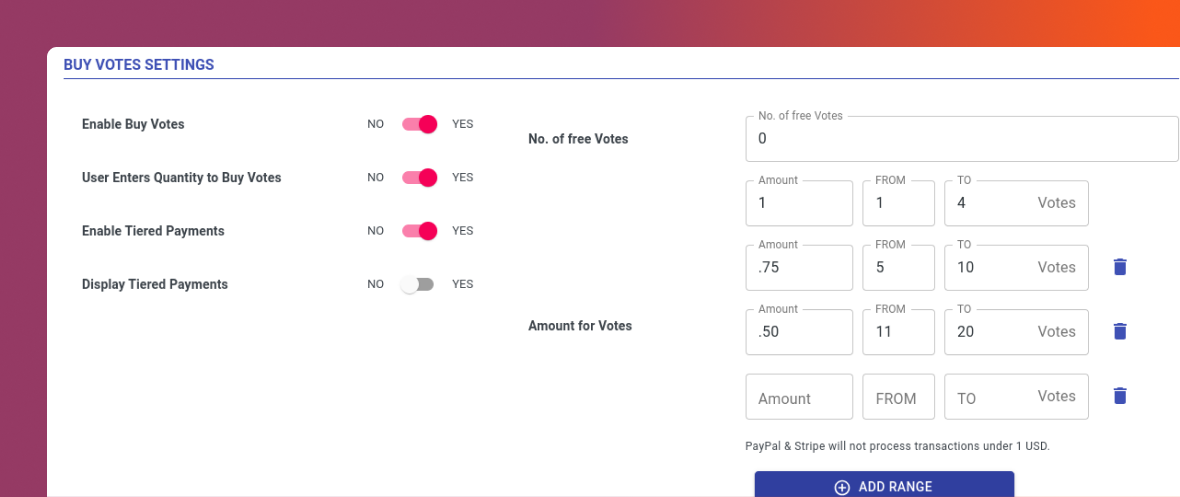
You can alternatively select a tiered pricing method. Here are the settings for the tiered pricing method:
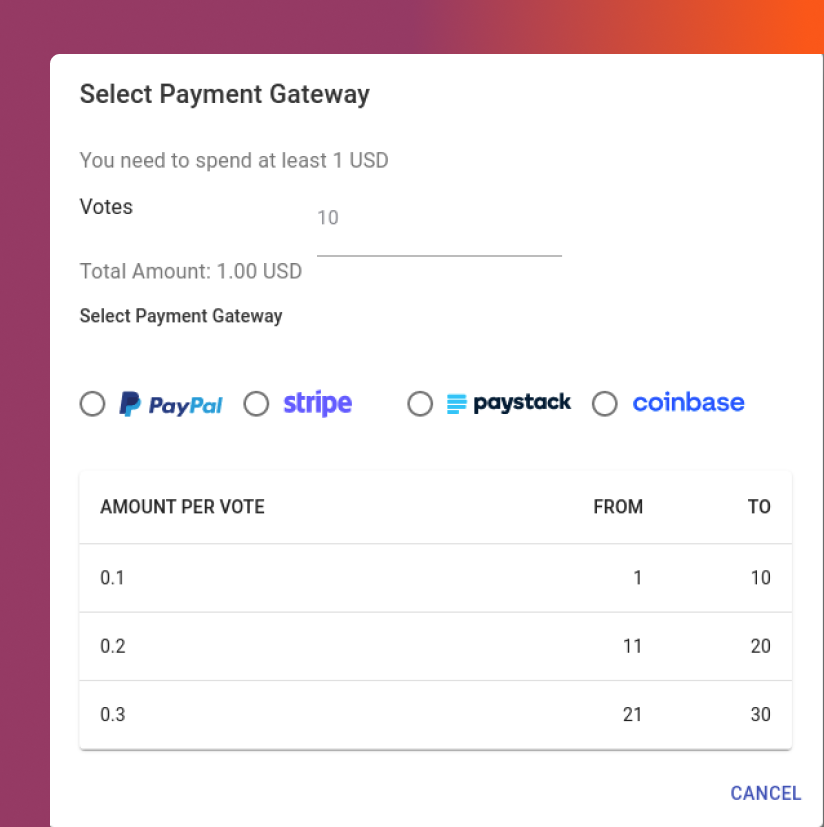
Here is the popup that voters will see when using the tiered pricing method:
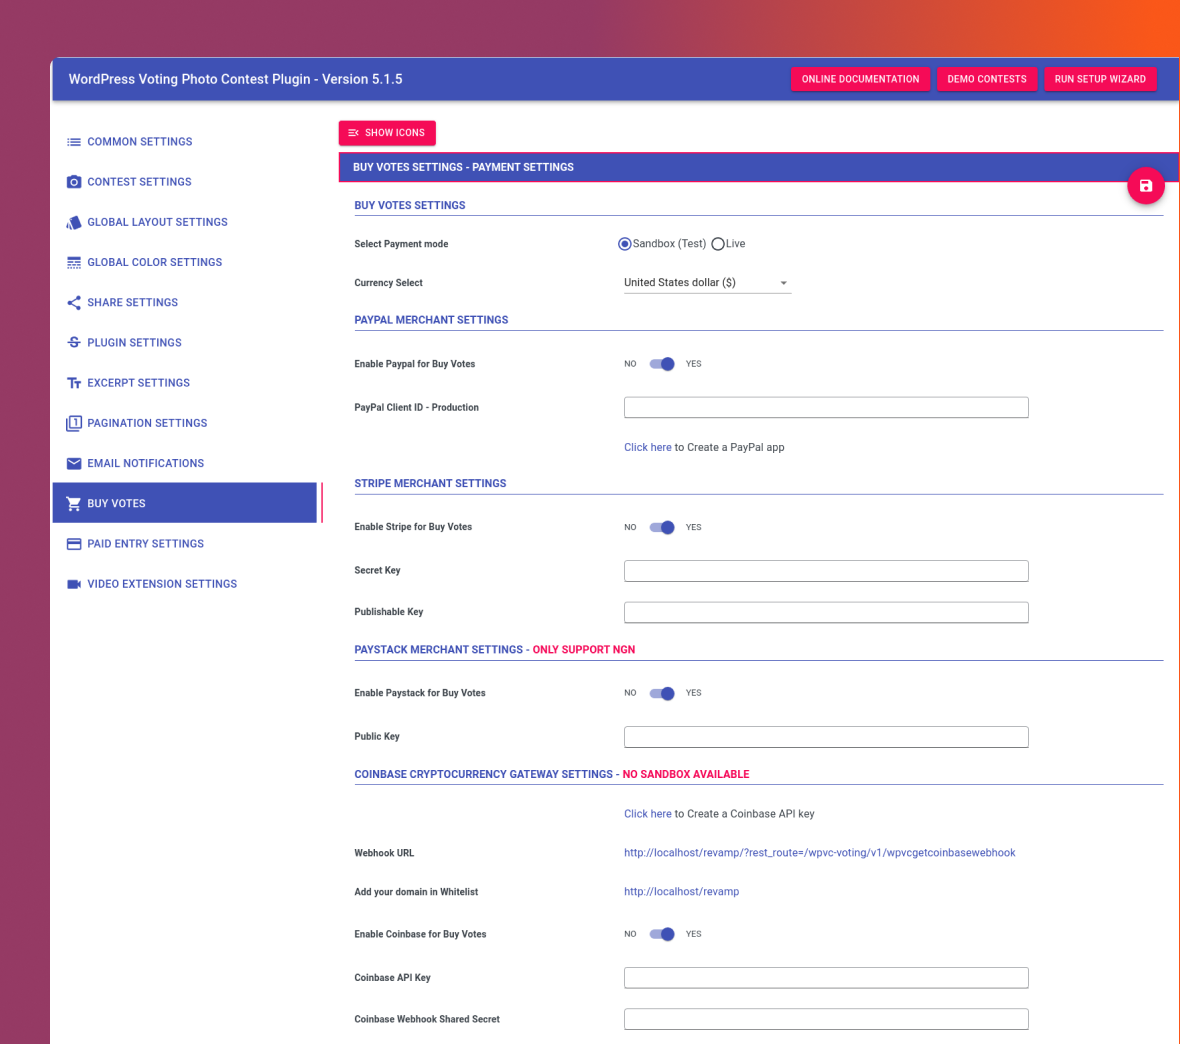
Here are the global settings to connect with PayPal, Stripe or PayStack. Make sure to select LIVE in order to accept payments. Otherwise, you can use sandbox mode for testing purposes. Please be aware that while PayPal and stripe are available for most countries, we can only offer support for countries that PayPal and Stripe support.
While adding the Stripe Secret key make sure to add the full Secret key without ‘****’ or ‘….’. Otherwise, It will cause errors while initiating with the Stripe Payment Gateway.
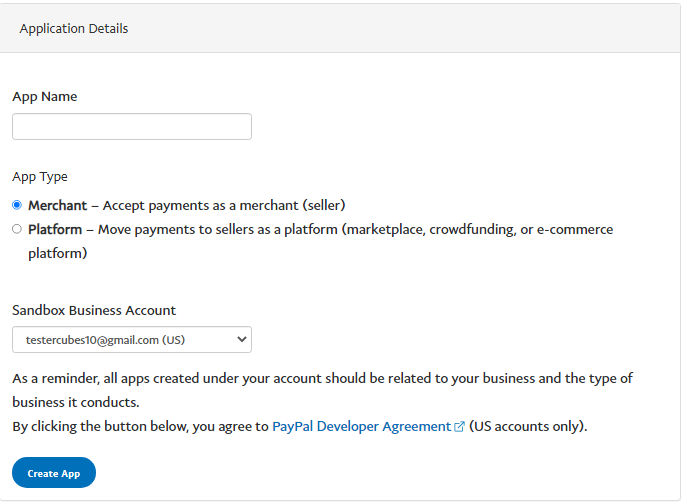
Here are the details to create the Client ID in the Paypal. Make sure that you create a LIVE APP in order accept payments. PayPal will default you to the Sandbox tab by default in the setup screen so you have to click the LIVE APP tab before creating the api keys. Otherwise, when clicking the “Buy Vote” button within your contest, the PayPal payment popup will open and close indicating that you have not setup everything correctly. This indicates you are trying to use a sandbox api key with the plugin set on live mode or vise versa.
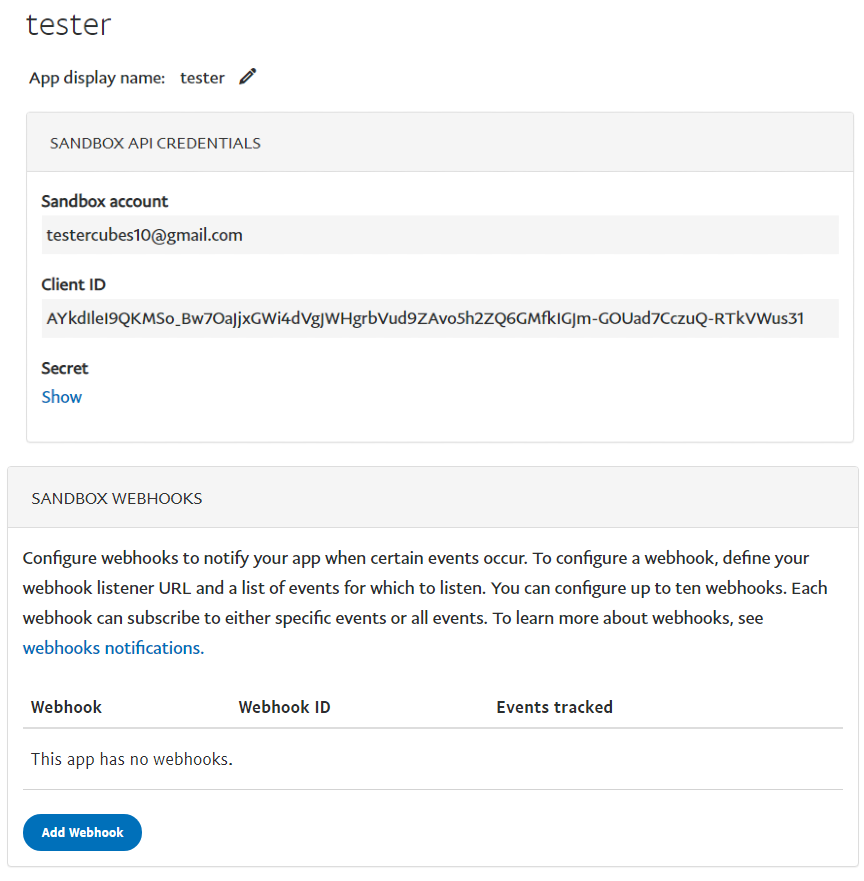
Copy the LIVE Client ID and use it in the Paypal Settings in the plugin
Finally, make sure that you are logged out of PayPal when you test as you cannot buy votes from yourself.
You can buy your votes using the Crypto Currency such as Bitcoin, Ethereum, Dogecoin, Bitcoin Cash, Dai, Litecoin & USD Coin with the Coinbase gateway. You need to register in the Coinbase using this link Coinbase Commerce before using the Crypto Currency Payment gateway.
After completing the registration in the Coinbase Commerce, you need to follow all the steps below to accept the Crypto Currency Payment for the Buy Votes Extension.
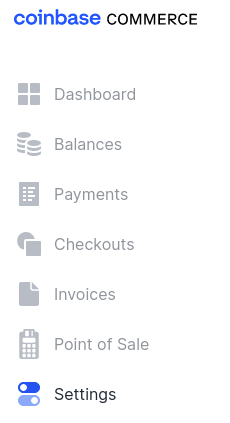
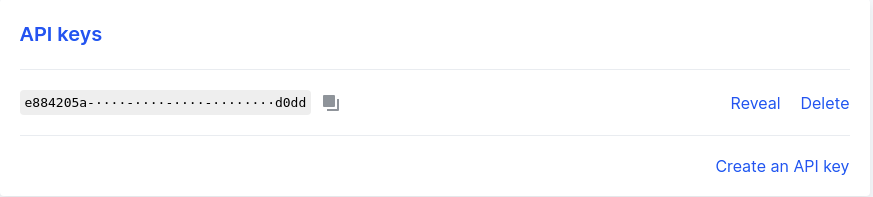
Create the API key in the Coinbase Commerce Dashboard under the Settings Tab as in the screenshot below. Once you create the API, Add in the Coinbase API Key textfield under Buy Votes Settings.
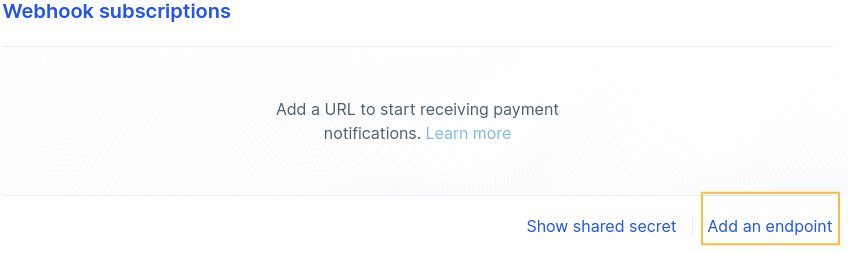
Copy the Webhook URL from the Buy Votes Settings Dashboard and add in the Coinbase Dashboard under Settings > Webhook Subscriptions. Since the Crypto Payment may take some time to confirm the transactions , So we need to add the Webhook where coinbase will return to the confirmations to Buy Votes Extension and the Votes will be added once the payment is confirmed.
Once you add the Webhook URL, Click on the Show Shared Secret from the Webhook subscriptions , Copy the secret code and paste it under the “Coinbase Webhook Share Secret” in the Buy Votes Extension Settings and move to next step.
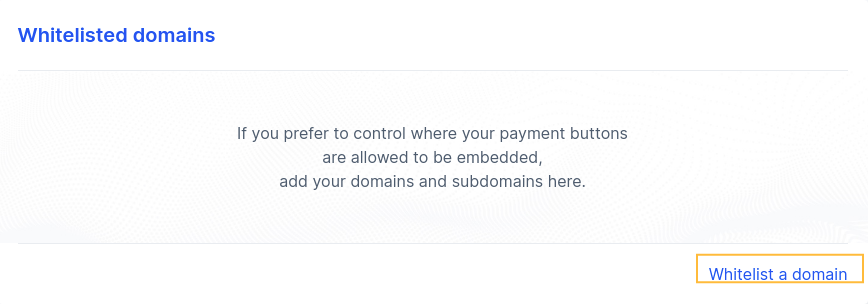
Finally You need to whitelist your domain URL in the Coinbase Settings. Copy the Domain URL from the Buy Votes Settings and add it in the Coinbase Dashboard under Whitelisted Domains